To get started we need an interface file on our FileMaker server which we can use for all of the following activities.
- From the session resources locate the file
InterfaceTemplate.fmp12in the Databases folder. - Make a copy and rename it – my advice is to never use spaces in files which are going to be accessed through an API, you never know how the space will be encoded, so if it’s not there, there can be no issue. I’d suggest
YourInitialsInterface.fmp12, e.g.SJWInterface.fmp12, but other than no spaces (and no high ASCII characters either François!) it doesn’t really matter. The default user is Admin with no password. - Secure the file by opening it in FileMaker, renaming the ‘Full Access’ account and setting a password for that account. If you’re going to upload this to your own FileMaker server make sure you use credentials which will let you view the file if you have any server-level file visibility restrictions.
- Upload it to a FileMaker Server. At DevCon use:
- server: dapi.msdev.co.uk
- username: Administrator
- password: DevCon19
If you’re following along at home, that URL won’t resolve so you’ll need to use your own FileMaker Server.
- Link your interface to the data file
DevCon19Dataon the same server. (There is a copy of that file in the session resources so you can run all of this at a later time on your own FMS). - Add the
Contactstable from the data file to the graph for your interface file. If you don’t have theDevConData19file open you may be prompted to enter full access account details to authorise access- username: Administrator
- password: DevCon19
- Create a layout based on the contacts table. Call it
ContactsAPI. Add some fields to the layout, make sure you add at least the fields below, but you can include others if you wish.- Title
- First
- Last
- Company
- Job Title
- Photo Container
Don’t worry about styling this layout – the only person who’s ever going to see this file, or this layout is you!
- Next we’re going to create two user accounts, both of which have the
fmrestextended privilege. It doesn’t matter what you call the accounts, but they will have quite different privileges. I’d suggestYourInitialsFullAccessandYourInitialsReadOnly, e.g.SJWFullAccessandSJWReadOnly. We’ll also create privilege sets to go with these accounts, let’s start there. - Create a new privilege set called
DataAPI - Full accessand set the permissions like this:
- Create a second new privilege set called
DataAPI - Read onlyand set the permissions like this:
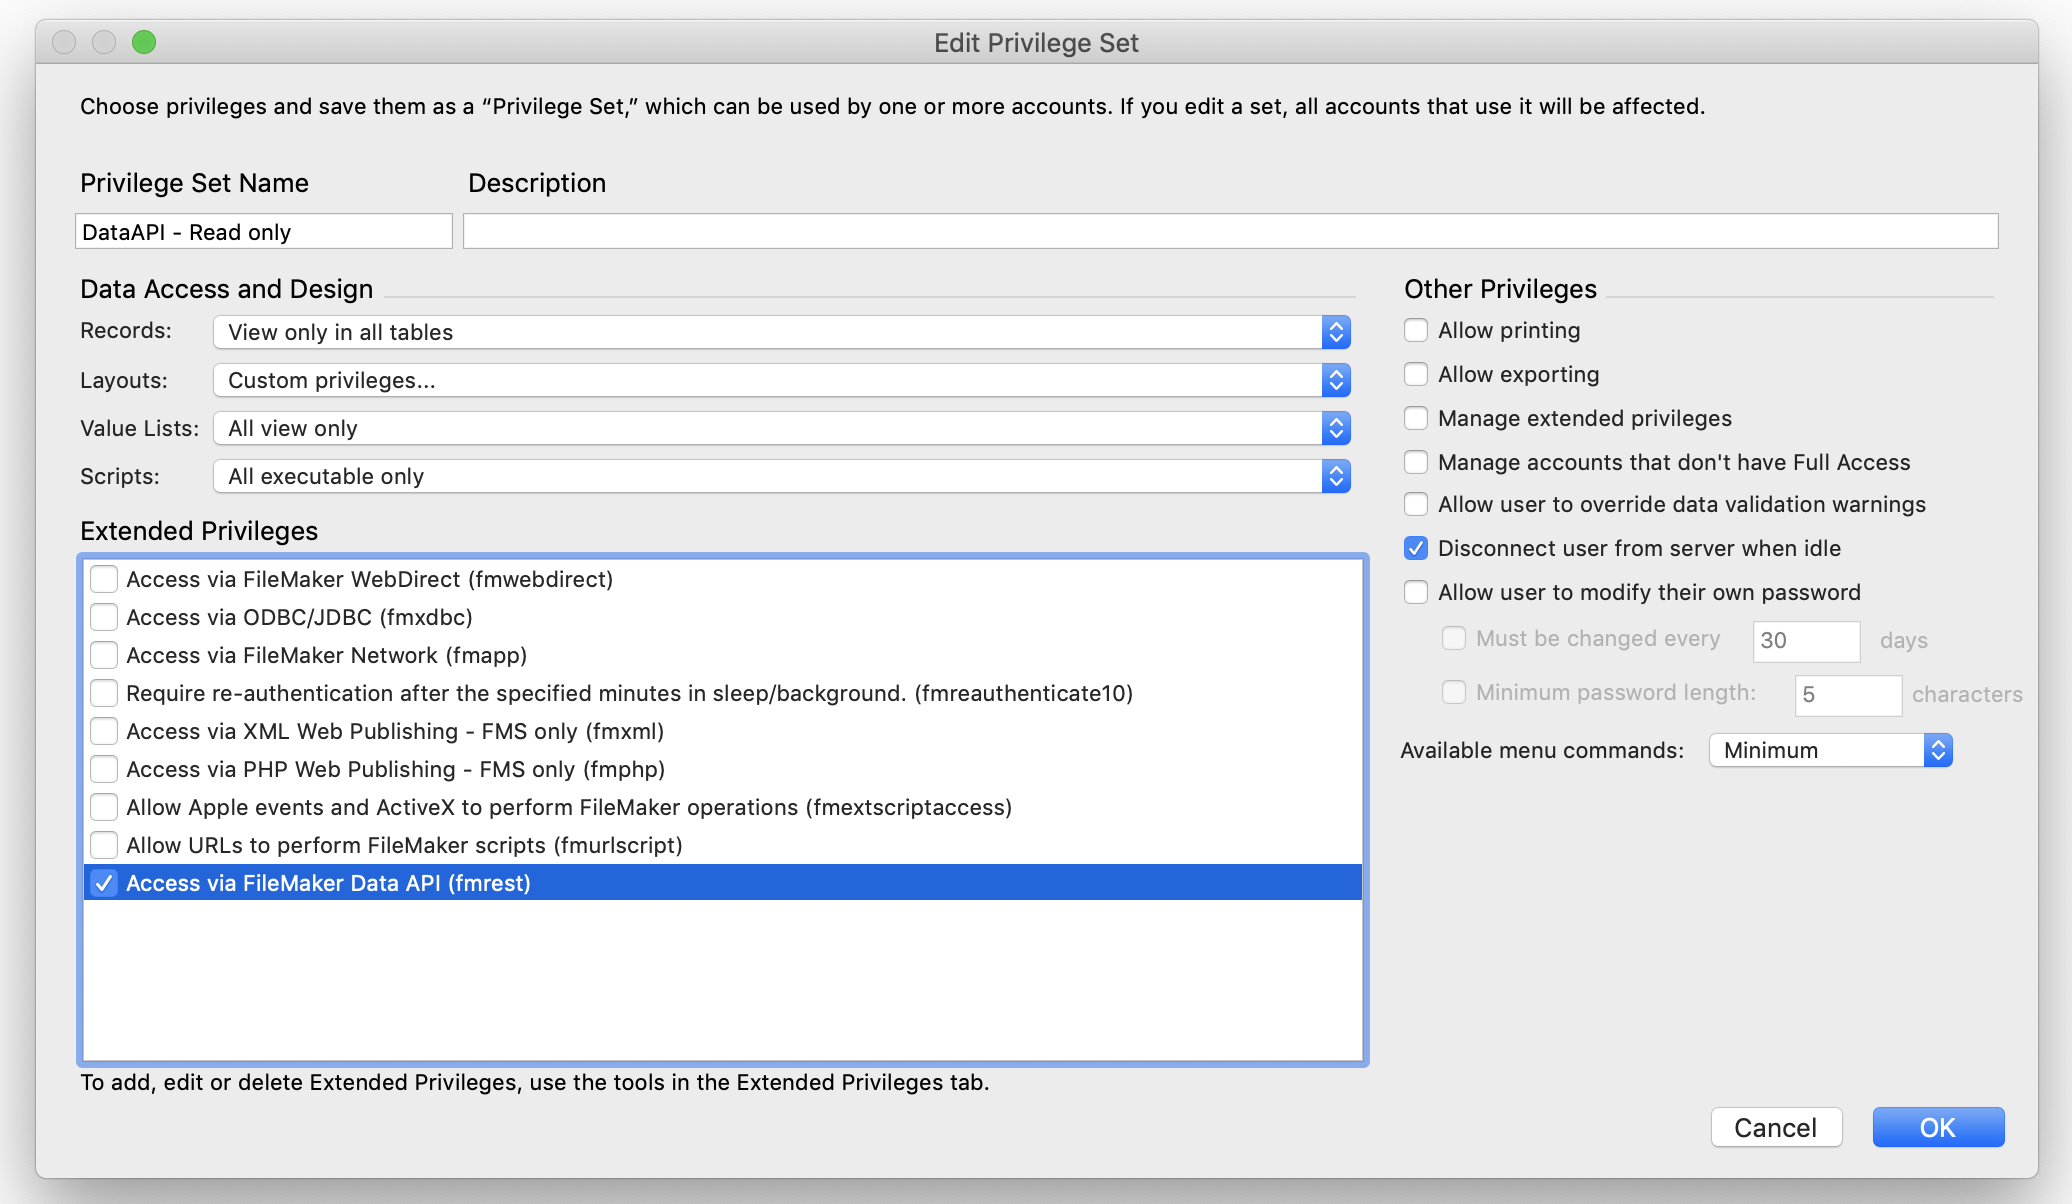
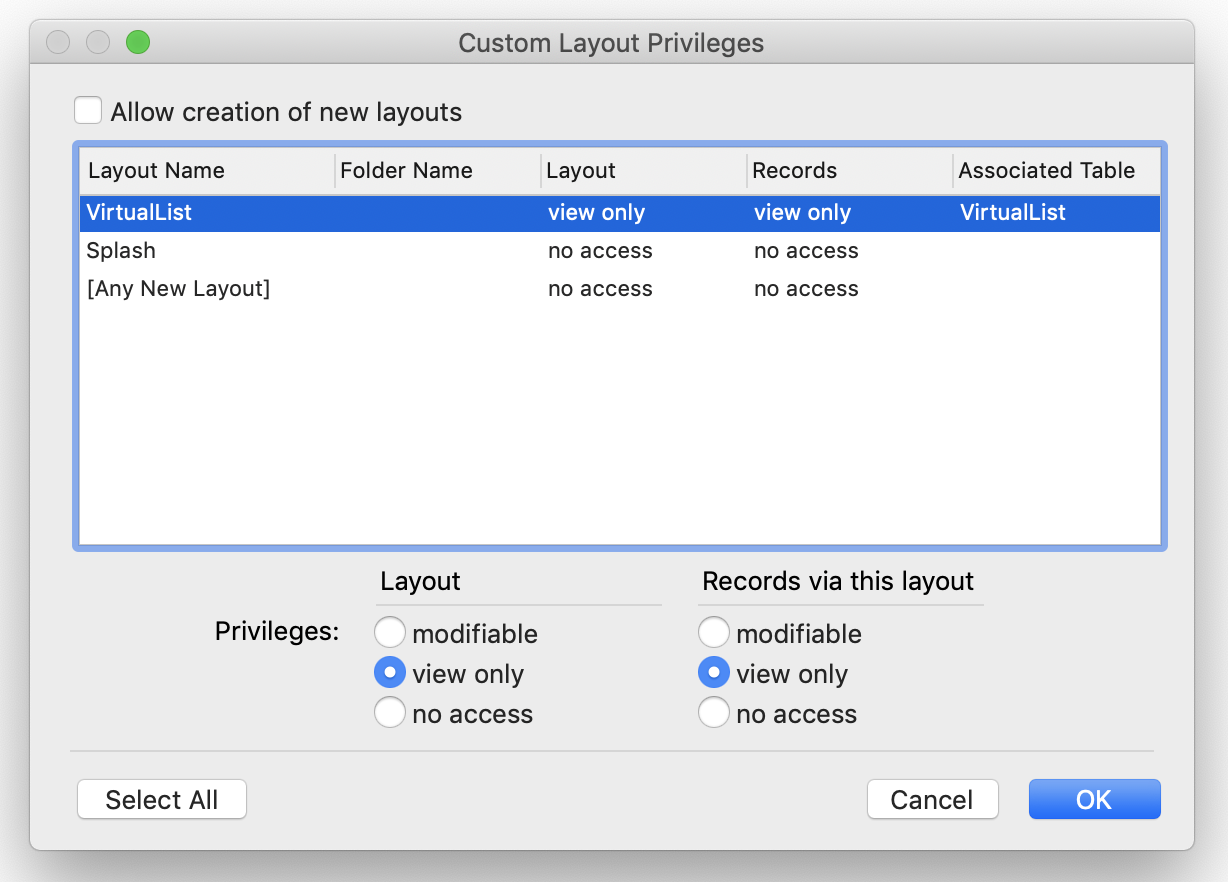
You’ll note that there are custom privileges for the layouts setting. This is what they need to be (if there are other layouts in your file set them tono access– the goal here is that this account can hardly do anything!
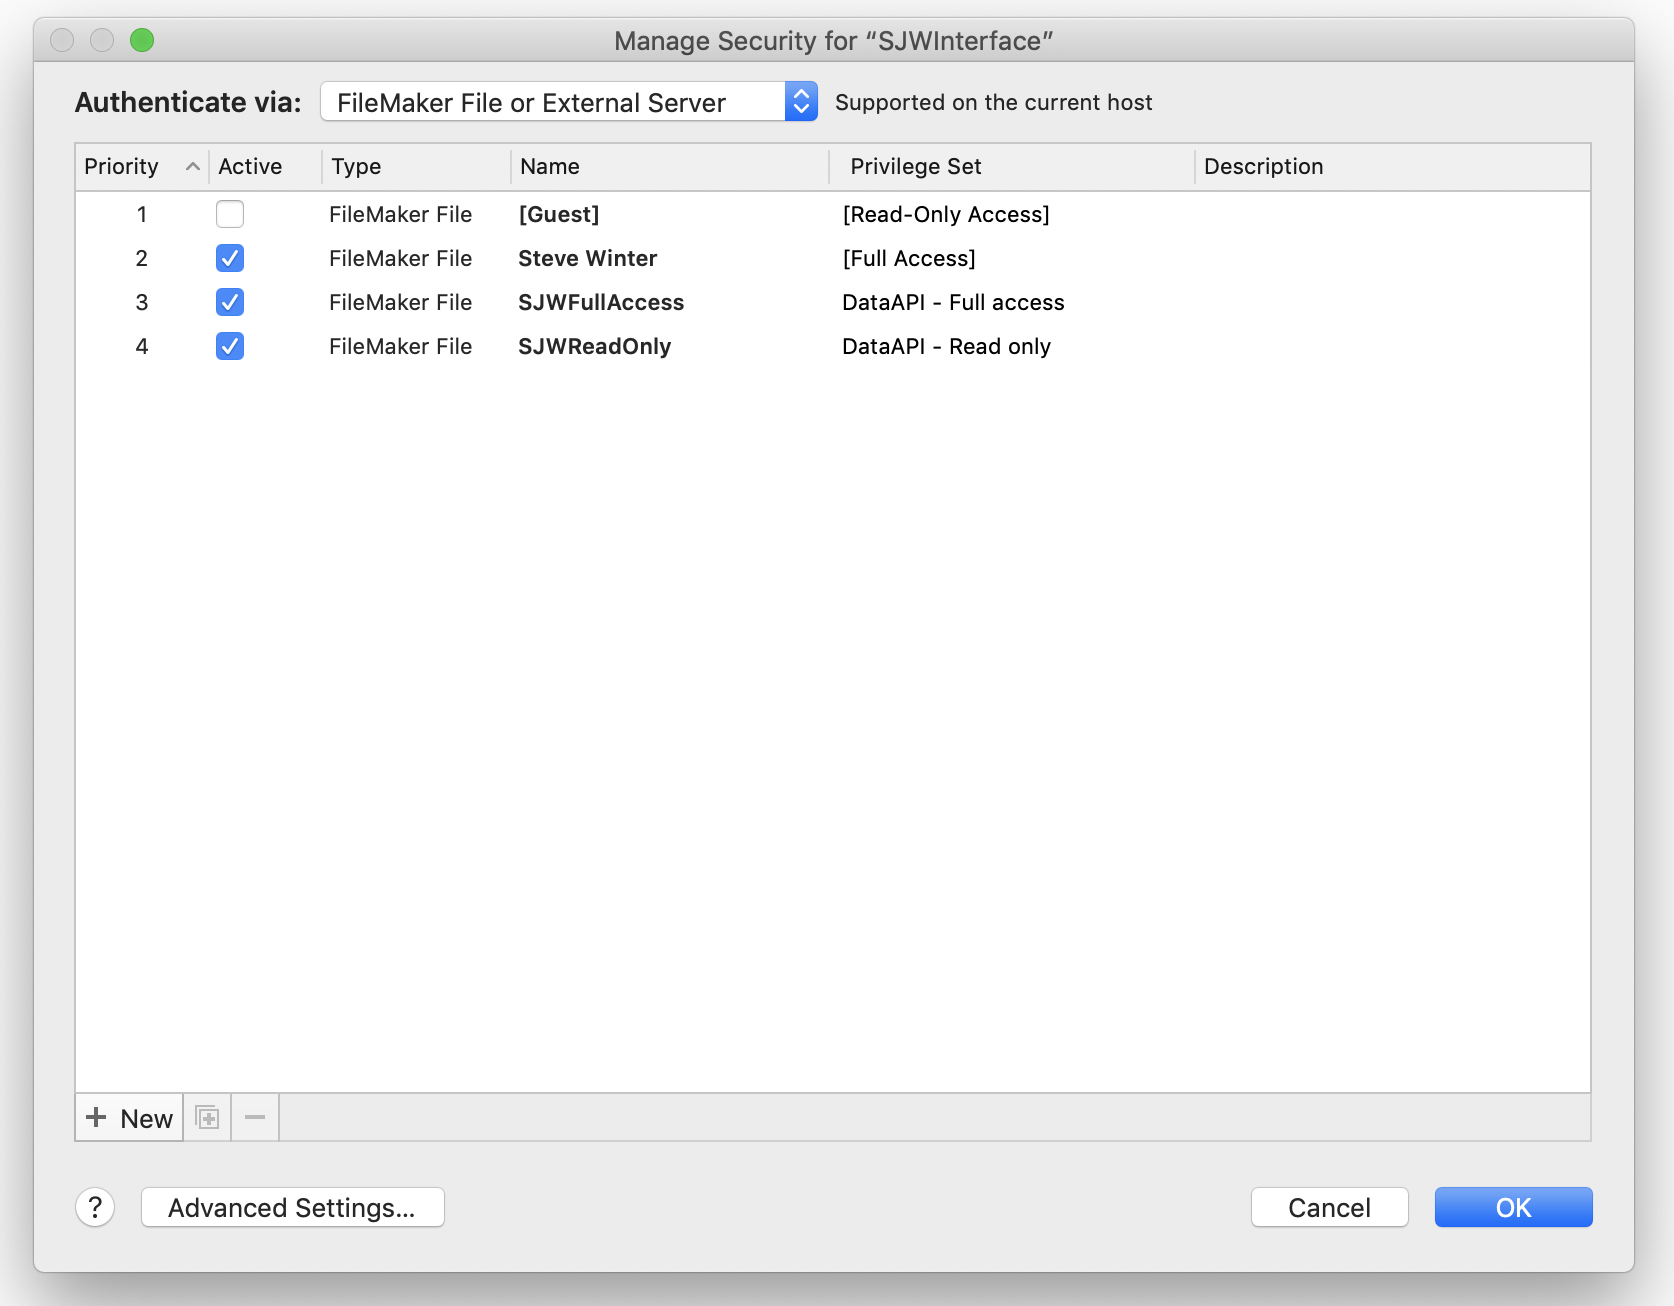
- Now create your full access and read only accounts and link them to the appropriate privilege set. Make sure you record or remember the passwords for these accounts – you’re going to need them later! You should end up with something which looks like this:
- Finally, open the data file
DevCon19Datafrom the server (see above for credentials) and create identical named accounts, with identical passwords and privilege sets – this is the only (slight) drawback of using data separation – the need to create accounts and privileges in every linked file.